How to Make a Table Tent in Word
Making a table tent in Word is surprisingly straightforward. You can easily design and print your own custom table tents for events, menus, or promotions right from Microsoft Word. The process involves setting up your document correctly and using basic Word tools to create your design.
This method is perfect for creating professional-looking table tents without needing special software. You’ll be able to get a great-looking design ready for printing in just a few minutes. Many people find this to be a cost-effective solution for their needs.
TL;DR:
- Set up your Word document for the correct size.
- Use text boxes and shapes for your design.
- Add your text and images carefully.
- Print and fold your table tent.
Ready to make your own? Let’s walk through exactly how to create a table tent in Word step by step.
“`htmlCrafting Your Table Tent Using Microsoft Word
Creating a professional-looking table tent is easier than you might think, even if you’re not a design whiz. Microsoft Word offers all the tools you need. We’ll guide you through the simple steps. You’ll have a custom table tent ready in no time.
Setting Up Your Word Document for Success
Before you start designing, getting your document set up correctly is key. This ensures your table tent will print and fold just the way you imagine. Think of this as laying the foundation for your creation.
Choosing the Right Page Size and Orientation
Most standard table tents are printed on letter-sized paper (8.5 x 11 inches). This size is perfect because it’s readily available and easy to handle. For a typical tri-fold table tent, you’ll want to set your page orientation to landscape. This gives you more horizontal space to work with.
To do this, go to the ‘Layout’ tab in Word. Click on ‘Orientation’ and select ‘Landscape.’ You’ll see your page change shape immediately.
Understanding Table Tent Dimensions
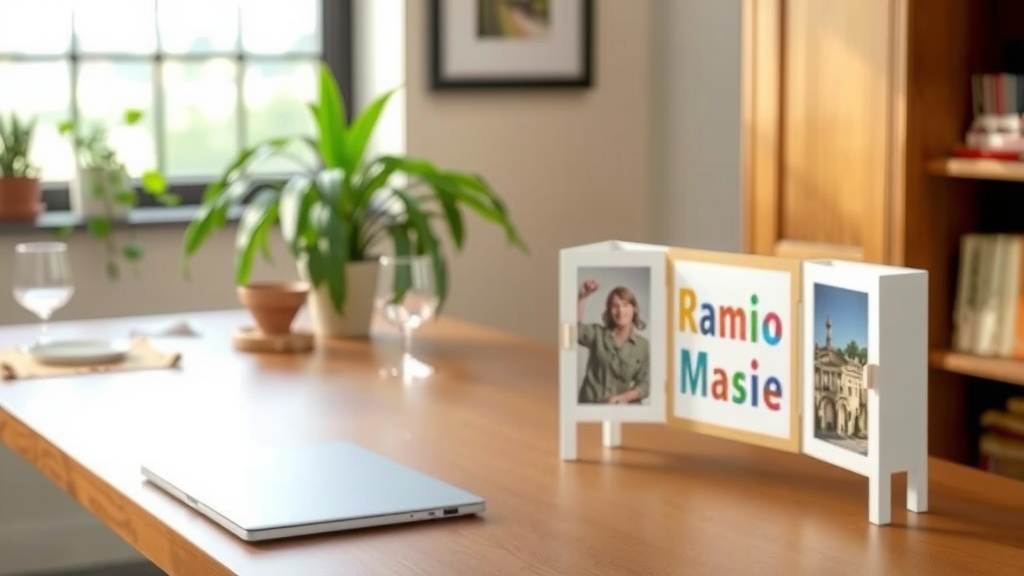
A common table tent design uses a standard letter-sized sheet divided into three panels. Each panel will usually be about 3.67 inches wide when printed and folded. This means your design will span across the entire landscape page.
You might want to sketch out your idea on paper first. This helps visualize how the content will appear on each panel. Remember, one side will be visible when folded, and the other will be the back.
Designing Your Table Tent with Word’s Tools
Now for the fun part: bringing your table tent to life! Word provides several user-friendly tools to help you create your design. We’ll focus on using text boxes and shapes.
Using Text Boxes for Your Content
Text boxes are your best friends for placing text anywhere on the page. They offer great control over placement and formatting. You’ll want to insert a text box for each section of your table tent.
To insert a text box, go to the ‘Insert’ tab. Click ‘Text Box’ and choose ‘Draw Text Box.’ Then, click and drag on your page to create a box. Type your desired text inside. You can resize and move these boxes freely.
Adding and Formatting Your Text
Once your text is in the box, you can format it just like any other text in Word. Select the text and use the options on the ‘Home’ tab to change the font, size, color, and alignment. For a table tent, larger, bolder fonts are often best for readability.
Consider what information needs to be most prominent. This might be a special offer, a menu item, or an event title. Place that text in a larger font size. Many design guides suggest using no more than two different fonts to keep the look clean.
Incorporating Shapes and Lines for Structure
Shapes can help you add visual interest or structure to your table tent. You can use rectangles to create backgrounds for text boxes or lines to divide sections. Word’s Shape tools are found under the ‘Insert’ tab.
Click on ‘Shapes’ to see a variety of options. You can draw rectangles, circles, or even lines. You can also change the fill color and outline of these shapes. This is a simple way to add a professional touch.
Adding Images and Logos
Images can make your table tent more engaging. Whether it’s a company logo or a relevant photo, Word makes it easy to insert them.
Go to the ‘Insert’ tab and click ‘Pictures.’ You can choose to insert an image from your computer (‘This Device’) or find one online. Once inserted, you can resize and move the image. Be mindful of image resolution; blurry images don’t look professional.
Many experts recommend using high-resolution images, especially for printing. A good rule of thumb is to use images that are at least 300 DPI (dots per inch) if possible.
Arranging Your Table Tent Panels
Think of your landscape page as a ruler that you’ll fold. You’ll have three main sections: a front panel, a back panel, and a small tab that helps it stand up. It’s important to place your content logically across these panels.
Designing the Visible Panels
When the table tent is folded, two panels will be visible. Typically, one panel is the ‘front’ and the other is the ‘back.’ You’ll want to ensure your most important information is on the front.
Imagine the page divided vertically into three equal parts. The leftmost section will be the back panel, the middle section will be the front panel, and the rightmost section will be the small tab that connects the two. However, this layout can be adjusted.
The Importance of the Folding Panel
The panel on the far right (in landscape orientation) is often the one that gets folded and glued or taped to the back panel to create the triangular shape. Make sure this panel doesn’t have any critical information that would be hidden or distorted.
Sometimes, designers place a simple color or a small logo here. It’s essentially the flap that holds everything together.
Printing and Assembling Your Table Tent
Once your design is complete, the final steps are printing and assembly. Careful printing and folding will make all the difference in the final appearance.
Printing Tips for Best Results
Use good quality paper. Cardstock or heavy paper works best for table tents. This gives them stability and a more professional feel. Standard printer paper can be too flimsy. Check your printer’s settings for paper type and quality.
Print a test page first on plain paper to check alignment and colors. This saves you from wasting expensive cardstock. Ensure your printer is set to print at 100% scale, not ‘fit to page,’ unless you’ve specifically designed for that.
Scoring and Folding for a Clean Crease
To get a crisp fold, it’s helpful to score the paper first. Scoring means making a light indentation along the fold line. You can do this gently with the back of a butter knife or a scoring tool along a ruler.
Carefully fold the paper along the scored lines. Press down firmly to create a clean crease. This is what gives your table tent its professional, sturdy look. You might need a bit of patience here!
Securing Your Table Tent
After folding, you’ll need to secure the tent. A small amount of glue stick or double-sided tape on the folding tab is usually sufficient. Press the tab firmly against the back panel to hold the shape.
Make sure the adhesive is strong enough to keep the tent from unfolding. Test it with your chosen method before mass-producing. For temporary events, even a small piece of tape can work in a pinch!
Quick Checklist for Your Table Tent Project
Here’s a quick rundown to keep you on track:
- Confirm Page Setup: Ensure your Word document is set to landscape orientation.
- Use Text Boxes: Place text and images within text boxes for precise control.
- Design Panels Logically: Plan content for front, back, and folding panels.
- Choose Quality Paper: Opt for cardstock or heavier paper for stability.
- Score Before Folding: Create clean creases for a professional finish.
- Test Print: Always print a draft to check alignment and content.
You’ve got this! With these steps, you can create effective and attractive table tents right from your computer.
“`Conclusion
You’ve now learned how to create your own custom table tents using Microsoft Word. By setting up your document correctly, utilizing text boxes and shapes, and paying attention to panel arrangement, you can design professional-looking table tents. Remember to use quality paper and score your folds for a clean finish. Your next step? Gather your content and images, open Word, and start designing your first table tent! You’ll be surprised how quickly you can produce effective promotional or informational materials.
Frequently Asked Questions
Can I make table tents that are not a standard tri-fold design?
Yes, Word’s flexibility allows for different shapes and folding methods. You can adjust text box sizes and arrangements to create unique table tent styles. Just visualize how your panels will connect and stand before you start designing.
What’s the best way to ensure my text is readable on a small table tent?
Use larger font sizes and bold text for key information. Limit the number of fonts you use, and ensure high contrast between text and background colors. We found that keeping it simple makes the biggest impact.
My images look blurry when I print. What can I do?
Ensure you are using high-resolution images, ideally 300 DPI or higher, before inserting them into Word. Also, check your printer settings to ensure it’s not set to a low-quality print mode.
How can I make sure the text and images line up correctly after folding?
It helps to sketch your layout on paper first, noting where the folds will be. When designing in Word, use the ruler guides and margins carefully. A test print on plain paper is essential for checking alignment before using cardstock.
Is it better to use Word’s built-in shapes or import graphics for designs?
For simple elements like colored backgrounds or dividers, Word’s shapes are perfect and easy to adjust. For more complex graphics, logos, or detailed illustrations, importing them from a graphics program will yield better results and quality.
![7 Best Affordable Backpacking Tents [2026]](https://leonardhomeoutdoor.com/wp-content/uploads/2026/08/7-best-affordable-backpacking-tents-2026-featured-768x432.jpg)