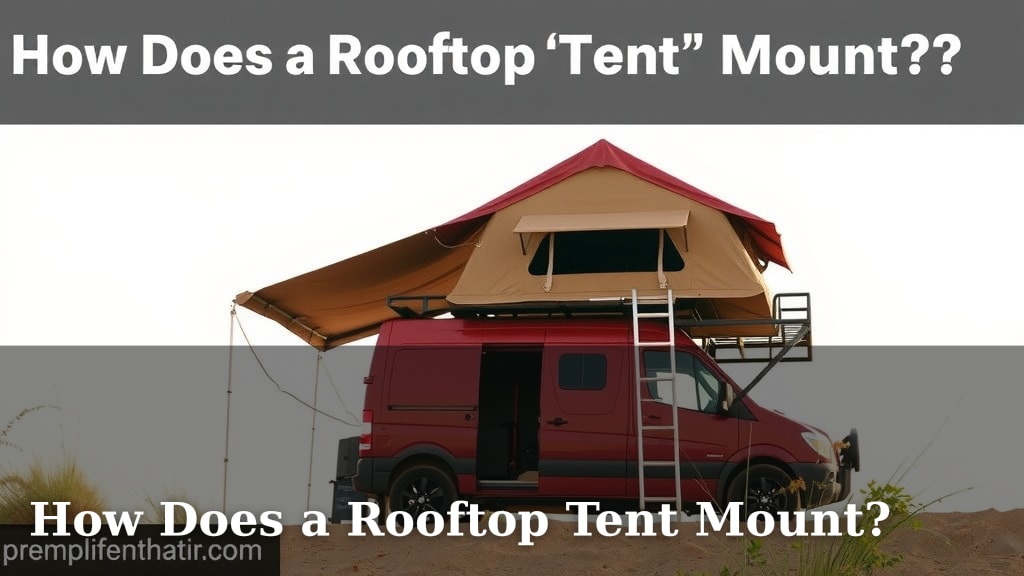
How Does a Rooftop Tent Mount?
A rooftop tent mounts to your vehicle using sturdy rack systems and mounting brackets. These systems securely attach the tent to your car’s roof bars or directly to the vehicle’s rails. It’s designed to distribute weight evenly for a stable and safe setup.
Getting your rooftop tent mounted correctly is key for adventure. We found that the right mounting hardware and a well-prepared roof rack are essential. This ensures your tent is ready for any journey, providing a reliable basecamp wherever you roam.
- Rooftop tents attach via a roof rack system.
- Mounting brackets connect the tent to the rack.
- Proper installation ensures safety and stability.
- Weight distribution is a critical design factor.
Let’s walk through exactly how your rooftop tent gets securely attached to your vehicle.
Securing Your Rooftop Tent: A Look at Mounting Methods
So, you’ve got a rooftop tent, and you’re wondering how it actually sticks to your car. It’s a fair question! We’ve researched this quite a bit, and the short answer is: your tent attaches via a specially designed roof rack system. Think of it as a sturdy bridge between your vehicle and your adventure basecamp.
This isn’t just about slapping something on top. It involves specific components working together. We found that understanding these parts helps make the mounting process clear and ensures your tent is as safe as possible when you’re out exploring.
The Foundation: Your Vehicle’s Roof Rack
Before your tent can even think about hitting the road, your vehicle needs a proper foundation. This foundation is usually a roof rack system. Not all roof racks are created equal, and they’re the first line of defense for securely mounting your rooftop tent.
Types of Roof Racks for Rooftop Tents
There are a few main types you’ll encounter. The most common are crossbars that span between your vehicle’s side rails or mounting points. Some vehicles come with integrated side rails, while others might require a specific fit kit for the crossbars. We found that the weight capacity of your roof rack is absolutely critical. Your tent, plus occupants, can add a lot of weight.
Another type is a full-length roof platform rack. These offer a very robust mounting surface and are often preferred for larger or heavier rooftop tents. Many experts recommend these for maximum stability (Four Wheel Drive Magazine).
Checking Your Rack’s Compatibility
It’s essential to ensure your existing roof rack can handle the load. You’ll want to check your vehicle’s manual and the specifications for your roof rack. Most rooftop tent manufacturers will also list the compatible rack systems or minimum requirements. We found that doing this check upfront saves a lot of headaches later.
The Connection: Mounting Brackets and Hardware
Once you have a suitable roof rack, the next step is connecting the tent itself. This is where the mounting brackets and specific hardware come into play. These are the unsung heroes of your rooftop tent setup.
Understanding the Mounting Bracket System
Rooftop tents typically come with a set of mounting brackets. These are usually U-shaped or L-shaped pieces of strong metal. They are designed to wrap around your roof rack’s crossbars or side rails.
The brackets then attach to the underside of the tent. This creates a direct, secure link. We found that the quality of these brackets is important; they need to be durable enough to withstand road vibrations and weather.
How the Hardware Works
Along with the brackets, you’ll have bolts, nuts, and washers. These are used to tighten the brackets onto your roof rack and to secure the tent to the brackets. It’s like building a sturdy sandwich where your roof rack is the filling, and the tent is the top slice!
Many manufacturers provide all the necessary hardware. You might need a wrench or socket set to do the tightening. We found that ensuring all nuts and bolts are tightened securely is a key step for safety. It’s also a good idea to periodically re-check them, especially after your first few trips.
The Mounting Process: Step-by-Step Guidance
Let’s walk through what the actual mounting looks like. While each tent model can vary slightly, the general principles are the same. We found that taking your time and following the instructions is key.
Positioning Your Tent on the Rack
First, you’ll need to carefully place the rooftop tent onto your vehicle’s roof rack. This can sometimes be a two-person job due to the tent’s size and weight. Ensure the tent is centered and balanced on the rack.
You’ll usually align the tent’s mounting tracks or channels with the location of your crossbars. This positioning is crucial for even weight distribution.
Attaching the Brackets
Next, you’ll insert the mounting brackets through the tent’s base and around your crossbars. This is where the U-shaped or L-shaped pieces come into play. You’ll position them so they securely grab the crossbars.
Then, you’ll use the provided bolts and nuts to fasten the brackets to the tent’s base. We found that it’s helpful to get all the brackets loosely attached first before fully tightening them. This allows for minor adjustments to ensure a snug fit.
Final Tightening and Checks
Once everything is in place, you’ll go around and tighten all the bolts and nuts. Ensure that each bracket is firmly holding the tent to the crossbars. Give the tent a gentle wiggle to make sure it feels stable and secure.
As a final safety check, we recommend consulting your tent’s manual for specific torque recommendations if available. It’s also a good idea to drive a short distance and then re-check the tightness of all fasteners.
Weight Distribution: The Science Behind Stability
A big part of how a rooftop tent mounts securely is through smart weight distribution. It’s not just about having strong brackets; it’s about how that weight affects your vehicle.
When properly mounted, the tent’s weight is spread across your roof rack system and, by extension, your vehicle’s frame. Many automotive engineers explain that this even distribution prevents undue stress on any single point (SAE International). This is why having a robust roof rack with adequate load-bearing capacity is so important.
| Bracket Type | Best For | Considerations |
|---|---|---|
| U-Bolt Brackets | Round or square crossbars | Easy to install, very secure when tightened |
| L-Shaped Brackets | Wing or aero-style crossbars | May require specific placement for optimal grip |
| Clamp-Style Brackets | Various rail types, often proprietary | Can offer a very strong, integrated fit |
Key Considerations for a Safe Mount
Ensuring your rooftop tent is mounted correctly is more than just convenience; it’s about safety for you and others on the road. We’ve gathered a few key points to keep in mind.
- Always use manufacturer-provided hardware when possible.
- Check your vehicle’s roof load capacity before purchasing a tent.
- Re-tighten all bolts periodically, especially after initial installation.
- Ensure the tent is level on the rack for optimal stability.
- Never exceed the tent’s or rack’s weight limit.
Following these guidelines helps ensure your adventure starts on solid ground, or rather, a solid roof!
Conclusion
Mounting your rooftop tent securely is all about understanding the system. You’ve learned that a reliable roof rack is your foundation, and mounting brackets with the right hardware are your connectors. Proper installation means even weight distribution for stability and safety on any terrain. This careful process ensures your tent is a dependable home base for all your adventures.
Ready to hit the road? Your next step is to confirm your rack’s compatibility and then meticulously follow the installation steps. Happy camping!
Frequently Asked Questions
How often should I re-tighten my rooftop tent mounts?
We recommend checking and re-tightening your mounting hardware periodically. It’s especially important after your first few trips and then every few months thereafter. Vibrations from driving can loosen bolts over time, so a quick check ensures continued safety.
Can I use my existing factory roof rack for a rooftop tent?
Sometimes, yes. However, you must verify that your factory rack has the necessary weight capacity and compatible mounting points for your specific tent. We found that aftermarket racks are often more robust and better suited for this purpose.
What happens if my rooftop tent isn’t mounted level?
Mounting your tent unevenly can cause stress on the mounting hardware and the tent itself. It can also affect the stability of the tent when deployed. Ensuring your tent is level on the rack is key for a safe and comfortable setup.
Do I need any special tools to mount a rooftop tent?
Most rooftop tents come with the necessary hardware, and you’ll typically need basic tools like a wrench or socket set to tighten the bolts. Always refer to your tent’s manual for specific tool recommendations and torque specifications.
Is it okay to exceed the weight limit of my roof rack when the tent is mounted?
Absolutely not. Exceeding your roof rack’s weight limit, whether for the static load (tent mounted) or dynamic load (tent plus occupants while driving), is dangerous. It can lead to rack failure, damage to your vehicle, and potential accidents.