How to Tent a Turkey With Aluminum Foil
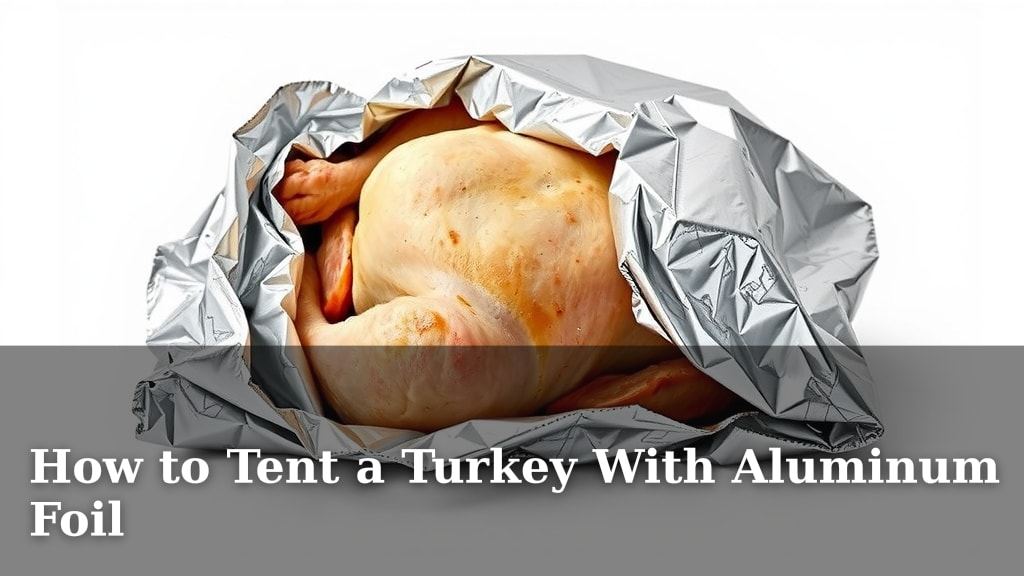
Yes, you can absolutely tent a turkey with aluminum foil to keep it moist and delicious. Tenting your turkey with foil helps prevent the breast meat from drying out while the rest of the bird cooks. It’s a simple trick for a more juicy and evenly cooked Thanksgiving centerpiece.
When you’re roasting a big bird like a turkey, different parts cook at different rates. The breast meat is leaner and can overcook quickly. Using foil as a tent is a tried-and-true method to manage this cooking difference. It’s a practical way to ensure your turkey isn’t dry in one spot and undercooked in another, helping you achieve that perfect roast.
- Tent your turkey with foil to keep it moist.
- This prevents the breast from drying out.
- It helps the turkey cook more evenly.
- Use foil during the final stages of roasting.
Let’s walk through exactly how to tent your turkey with foil for the best results. We’ll cover when to do it and how to do it right.
Mastering Your Turkey Tent: A Foil Strategy
You’re probably wondering, “When exactly should I put that foil on my turkey?” It’s a common question. Most folks get the best results by tenting their turkey during the final part of the roasting process. This is typically the last 30 to 60 minutes of cooking. By this point, the skin might be getting beautifully golden brown, perhaps even a little too quickly for your liking. Your goal is to let the internal temperature of the turkey rise to a safe level without burning the exterior. Tenting acts like a little oven-safe blanket. It reflects heat back onto the bird.
Why the final stretch? If you tent too early, you can steam the turkey instead of roasting it. That’s not quite the crispy-skinned perfection you’re aiming for. We want that gorgeous, deep brown color. The foil comes to the rescue precisely when the skin is at risk of becoming a little too dark. Think of it as a strategic move, not a blanket for the whole journey.
The Art of Folding Your Turkey Tent
So, how do you actually create this magic foil tent? It’s simpler than you might think. You’ll need a large sheet of aluminum foil. It needs to be big enough to cover your turkey loosely. You don’t want it to be airtight. A snug fit can trap steam and hinder browning. Your turkey is not a science experiment in a sauna; it’s a delicious centerpiece.
Creating the Basic Tent Shape
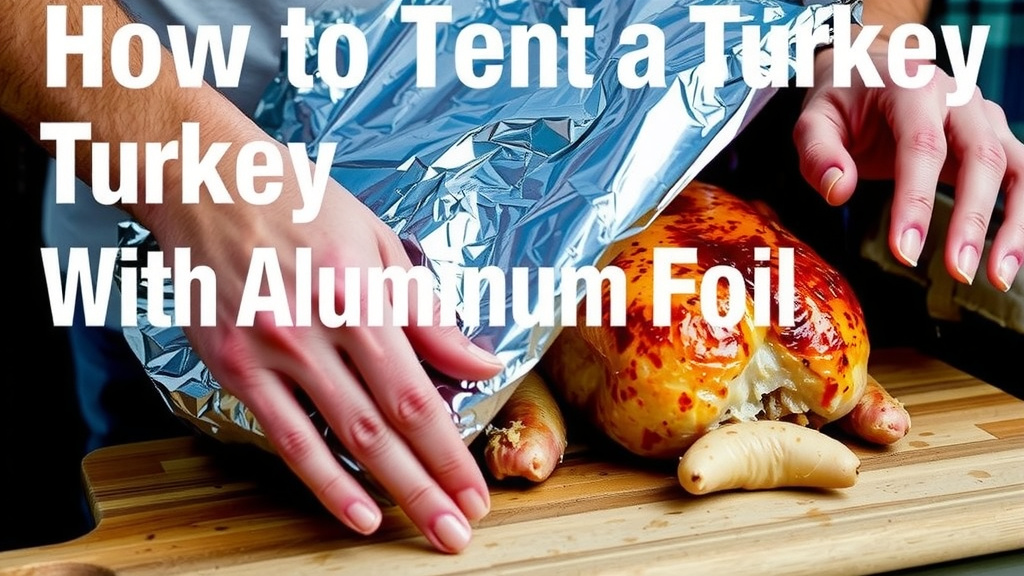
Start by unfolding a generous piece of foil. Place your roasting pan with the turkey in the center of the foil. Then, gently bring the edges of the foil up and over the turkey. You’re essentially forming a tent shape. The foil should extend from the edges of your roasting pan, creating a dome over the bird.
Make sure there’s plenty of space between the foil and the turkey’s highest point. You don’t want the foil touching the skin, especially the breast meat. If the foil sticks, it can pull off some of that lovely browned skin when you remove it. We’re building a protective shield, not a second skin.
Securing Your Tent in Place
How do you keep this tent from collapsing? Most of the time, the weight of the foil itself, draped over the turkey and resting on the edges of the roasting pan, is enough. The foil will mold slightly around the contours of the bird. You can also fold the edges of the foil over themselves to create a slightly sturdier rim. This helps it hold its shape better.
If your roasting pan has high sides, that’s ideal. The foil can rest securely on top. If your pan is shallower, you might need to get a little creative. Some people gently tuck the foil under the rim of the pan. Others might use a few large metal clips to secure the foil to the pan’s edge. Just ensure whatever method you use, it’s oven-safe and won’t melt or spark. We are going for tasty, not terrifying.
When to Apply and Remove the Foil Tent
Timing is everything with turkey. Applying the foil too soon can prevent the skin from crisping up nicely. Waiting too long means your breast meat might already be drying out. So, when is the sweet spot?
The Ideal Time to Tent Your Turkey
As mentioned, the last 30 to 60 minutes of cooking is generally the best time. Check your turkey’s internal temperature. When the thickest part of the thigh reaches about 160°F (71°C) and the breast is nearing 165°F (74°C), it’s often time to consider tenting. The breast will continue to cook while the bird rests.
Keep an eye on the color of the skin. If you notice the breast or wing tips are getting very dark before the thigh is cooked through, that’s a clear sign it’s time for the foil. Many chefs recommend starting to check the turkey’s color around the 2-hour mark for a standard-sized bird, and then adjusting as needed.
The Grand Reveal: Removing the Foil
Once you’ve tented the turkey, continue roasting it. About 15-20 minutes before your target finish time, it’s usually time to remove the foil. This gives the skin a chance to crisp up and regain that beautiful golden-brown finish. You want that attractive sheen for your holiday table!
Carefully peel back the foil. Be cautious of the hot steam escaping. Then, let the turkey finish cooking uncovered. Keep an eye on it to ensure it doesn’t overcook. The goal is a perfectly cooked interior and a gorgeously crisp exterior. Removing the foil allows the radiant heat to work its magic on the skin.
Troubleshooting Common Tenting Issues
Even with the best intentions, sometimes things don’t go exactly as planned. Don’t worry, we’ve all been there. Here are a few common scenarios and how to handle them.
My Turkey Skin Is Still Pale Under the Foil
If you remove the foil and the skin isn’t as brown as you’d like, don’t panic. You can always increase the oven temperature slightly for the last 10-15 minutes. Alternatively, you can carefully brush the skin with melted butter or a bit of cooking oil. Then, broil the turkey for a few minutes, watching it very closely. Broilers are powerful, so a minute can make a big difference!
The Breast Meat Still Feels Dry
This can happen if the turkey was tented too late, or if the oven temperature was too high. Tenting helps, but it’s not a magic cure for an already overcooked breast. Some chefs suggest basting the breast meat more frequently during the initial roasting stages. You can also try a technique called “propping” the breast, where you place chunks of butter or aromatics underneath the skin before roasting.
My Turkey Is Cooking Too Fast Overall
If your entire turkey seems to be cooking much faster than anticipated, you might need to lower your oven temperature slightly. A lower, slower cook can often lead to more even results. Tenting can help here too, by slowing down the outer cooking rate. Remember, always trust your thermometer over the clock.
Tenting vs. Other Turkey Cooking Methods
Foil tenting is a fantastic method, but it’s not the only trick in the book. Understanding how it compares can help you make the best choice for your needs.
| Method | Pros | Cons |
|---|---|---|
| Foil Tent | Prevents drying, easy to use, budget-friendly. | Can hinder crisping if left on too long. |
| Basting | Adds flavor, helps moisture. | Opens oven door frequently, potentially lowering temperature; can make skin soggy. |
| Oven Bag | Traps moisture effectively, easy cleanup. | Can sometimes result in steamed texture, less crispy skin. |
| No Tent/Uncovered | Maximum crispy skin potential. | Higher risk of dry breast meat if not carefully monitored. |
Many sources suggest that a combination of methods works best. For instance, you might baste your turkey throughout the cooking process and then use a foil tent in the final hour. This gives you the benefits of both moisture and controlled browning. Research indicates that the key to a great turkey is managing the temperature differential between dark and white meat (National Turkey Federation).
Quick Checklist for Perfect Turkey Tenting
Here’s a quick rundown to ensure your tenting goes smoothly:
- Use Heavy-Duty Foil: It’s less likely to tear.
- Tent Later, Not Earlier: Aim for the last 30-60 minutes.
- Create Space: Don’t let foil touch the skin directly.
- Ensure Ventilation: Don’t seal the tent tightly.
- Remove for Crisping: Take foil off for the last 15-20 minutes.
- Trust Your Thermometer: Cook to temperature, not just time.
Conclusion
You’ve now got the know-how to perfectly tent your turkey with aluminum foil. It’s a simple yet effective strategy to ensure your bird stays moist and cooks evenly, especially protecting that delicate breast meat from drying out. Remember, the key is timing – tenting during the final stages of roasting and removing the foil to allow for that beautiful, crispy skin. By following these steps, you’re well on your way to serving a Thanksgiving centerpiece that’s both juicy and golden brown. Now, go forth and conquer that turkey!
Frequently Asked Questions
How much foil do I really need for a turkey tent?
You’ll need a large sheet of heavy-duty aluminum foil, big enough to loosely cover your entire turkey and extend to the edges of your roasting pan. Avoid using too little foil, as it won’t provide adequate coverage. Ensure there’s plenty of space between the foil and the turkey’s highest point so it doesn’t touch the skin.
Can I tent my turkey for the entire cooking time?
No, it’s best to only tent your turkey for the final 30 to 60 minutes of roasting. Tenting too early can prevent the skin from getting nice and crispy, potentially leading to a steamed rather than roasted texture. The foil is meant to protect the bird in its final cooking stages.
What if my turkey’s skin is already getting too brown before I want to tent it?
If your turkey’s skin is browning too quickly, it’s a clear sign it’s time to tent it with foil. This will shield the skin from direct heat, allowing the internal temperature to rise safely without the exterior becoming burnt. You can then remove the foil later to let it crisp up.
How do I keep the foil tent from falling off my turkey?
Typically, the weight of the foil draped over the turkey and resting on the roasting pan’s edges is enough to secure it. For added stability, you can fold the foil edges over themselves to create a sturdier rim. If your pan has shallow sides, gently tucking the foil under the rim or using oven-safe clips can help.
Is it okay if the foil touches parts of my turkey?
It’s best to avoid direct contact between the foil and the turkey’s skin, especially the breast meat. If the foil sticks, it can pull off some of that desirable browned skin when you remove it. Aim for a loose tent that creates a protective space over the bird.


![7 Best Budget 10 Person Tent [2026]](https://leonardhomeoutdoor.com/wp-content/uploads/2026/08/7-best-budget-10-person-tent-2026-featured-768x432.jpg)