
Freestanding vs Non-Freestanding Backpacking Tents: Which is Best
When choosing a backpacking tent, the main difference between freestanding and non-freestanding models comes down to setup and support. Freestanding tents stand up on their own, needing only stakes for stability, making them easier to pitch anywhere. Non-freestanding tents rely on guy lines and stakes to create their structure, often offering a lighter weight but requiring more setup effort.
Understanding this distinction is key for your next backcountry trip. Your choice impacts campsite flexibility, setup time, and overall pack weight. We found that most campers prefer freestanding for its convenience, especially in challenging terrain. Non-freestanding tents are a favorite for ultralight backpackers who prioritize minimal weight above all else.
- Freestanding tents use poles to support their structure.
- They are easy to set up on any surface.
- Non-freestanding tents use stakes and guy lines for support.
- These are typically lighter but require more practice to pitch.
- Your choice depends on weight, ease of use, and campsite conditions.
Let’s dive into the specifics of each type to help you find the perfect tent for your adventures.
Weighing Your Options: Freestanding Versus Non-Freestanding Backpacking Tents
Choosing the right backpacking tent can feel like a big decision. It’s your home away from home on the trail, after all! A major factor separating tents is how they stand up: freestanding or non-freestanding. Understanding this difference will help you pick the best shelter for your needs. We found that the main distinction lies in their support system and how you pitch them. While this article focuses on freestanding vs non-freestanding, understanding tent structures also involves considering an air tent vs pole tent comparison.
Understanding Freestanding Tents: The Easy Setup Champs
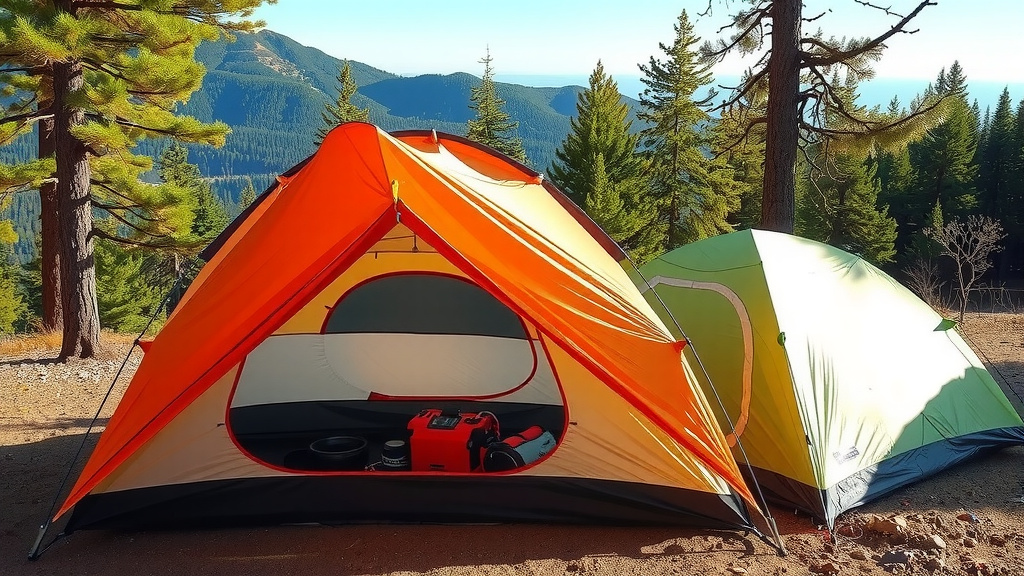
So, what makes a tent freestanding? Simply put, it means the tent can stand up on its own, much like a small room. It uses a system of flexible poles that create its shape and provide structure. You can set it up, move it around, and even shake out the dirt before staking it down.
How Freestanding Tents Work
These tents typically have a pole structure that holds the fabric taut. You connect the poles, insert them into sleeves or clips on the tent body, and voilà! The tent pops up. The rainfly, if it has one, often attaches easily over the tent body. Because the structure is independent, you don’t need to use stakes to get it standing. Stakes are only used to anchor it to the ground and keep it from blowing away. This makes them incredibly forgiving.
The Benefits of Going Freestanding
One of the biggest pluses is ease of use. If you’re new to backpacking or just want a quick setup after a long day, freestanding tents shine. They are perfect for pitching on a variety of surfaces. Rock gardens, sandy beaches, or even a hard-packed dirt trail – you can usually pitch a freestanding tent without issue. We found this flexibility very appealing for spontaneous campsite choices.
- Super Easy Setup: Great for beginners and quick pitching.
- Pitch Anywhere: Works on sand, rock, or hard ground.
- Move Before Staking: Position it perfectly before anchoring.
- Better Airflow: Often have more space between the tent body and rainfly.
Potential Downsides to Consider
While convenient, freestanding tents aren’t always the lightest option. The pole system adds weight and bulk to your pack. Sometimes, they can also be more expensive than their non-freestanding counterparts. This is because the advanced pole designs and fabrics can increase manufacturing costs.
Exploring Non-Freestanding Tents: The Ultralight Approach
Now, let’s talk about non-freestanding tents. These models rely on tension and anchor points to create their structure. Instead of poles doing all the work, they use a minimalist pole design combined with stakes and guy lines. You’ll need to stake out the corners and then extend guy lines (ropes) to trees, rocks, or strategically placed stakes to pull the tent into its shape.
The Mechanics of Non-Freestanding Pitching
Think of it like setting up a parachute. You attach the poles to specific points, like the peak or corners, which give the tent some initial shape. Then, you carefully stake out the perimeter and attach guy lines. Pulling these lines taut is what fully erects the tent and creates the tension needed for stability. It often requires a bit more practice and understanding of how the tension works.
Why Ultralight Backpackers Love Them
The primary draw for non-freestanding tents is their lower weight. By reducing or eliminating bulky pole sets, manufacturers can create incredibly light shelters. For backpackers who measure every ounce, this is a huge advantage. Many experts say that shaving weight directly translates to more enjoyable miles on the trail. We found that for long-distance hikers, this weight saving is often a priority.
- Feather-Light Design: Significantly less pack weight.
- Compact Stuff Sack: Takes up less space in your backpack.
- Can Be Very Strong: When pitched correctly, they can withstand high winds.
The Trade-Offs: When Setup Gets Tricky
The main challenge with non-freestanding tents is their setup. You can’t just plop them down and have them stand. You need suitable anchor points. If you’re camping on solid rock with no trees or soft ground for stakes, pitching a non-freestanding tent can be very difficult, if not impossible. This means campsite selection is more critical. We found that a little practice in your backyard before your trip is highly recommended.
Comparing the Two: A Quick Overview
To help you visualize the differences, let’s put them side-by-side. Both types of tents are designed to keep you protected from the elements, but they get there in different ways. Your personal preferences and typical hiking conditions will guide your choice.
| Feature | Freestanding Tent | Non-Freestanding Tent |
|---|---|---|
| Support System | Internal poles provide structure | Poles + stakes + guy lines create tension |
| Setup Ease | Very easy, quick to pitch | Requires practice, needs anchor points |
| Weight | Generally heavier | Generally lighter |
| Campsite Flexibility | High – pitches almost anywhere | Lower – needs good staking ground |
| Price | Often mid to higher range | Can range widely, often budget-friendly for ultralight |
Making Your Decision: What’s Best for You?
So, which tent should you choose? It really comes down to your priorities. Are you planning short weekend trips where every ounce doesn’t matter as much, and you want the simplest setup possible? A freestanding tent is likely your best bet. Many parents find them easier to manage with kids.
On the other hand, if you’re tackling a multi-day trek, aiming for a personal best mileage day, or simply want to feel as light as possible on your feet, a non-freestanding tent might be calling your name. Experienced backpackers often master the pitching technique and appreciate the weight savings on long journeys. We found that some budget-conscious campers also gravitate towards non-freestanding options.
Consider these questions:
- What is your typical camping terrain? (Rocky, sandy, forested?)
- How much weight are you willing to carry?
- How much time and effort do you want to spend setting up camp?
- Are you a beginner backpacker or an experienced one?
- What’s your budget for a new tent?
Your Tent Pitching Checklist
No matter which style you choose, a little preparation goes a long way. Here’s a quick checklist to ensure a smooth setup:
- Familiarize Yourself: Practice pitching your tent at home before your trip.
- Check Your Stakes: Ensure you have enough, and they are appropriate for your expected ground conditions.
- Know Your Terrain: Scout for a level spot free of sharp rocks or roots.
- Guy Lines Ready: Untangle and prepare your guy lines for quick deployment.
- Ventilation is Key: Open vents or the rainfly for airflow to prevent condensation.
- Secure Everything: Double-check all stakes and guy lines, especially if wind is a factor.
Conclusion
Choosing between a freestanding and non-freestanding tent boils down to your personal backpacking style and priorities. Freestanding tents offer unmatched convenience and an easy setup, making them ideal for almost any surface and perfect for beginners or those who value speed. Non-freestanding tents, on the other hand, are the champions of ultralight travel, providing significant weight savings for experienced hikers who are comfortable with a more involved pitching process. Consider your typical terrain, how much weight you can manage, and how much setup effort you’re willing to put in. Whichever you choose, practice pitching it at home so you’re confident and ready for your next adventure!
Frequently Asked Questions
Can I use a non-freestanding tent on a rocky campsite?
Pitching a non-freestanding tent on solid rock can be challenging. You’ll need to find small cracks or crevices for your stakes, or use heavy rocks to anchor your guy lines. Some non-freestanding tents come with extra-long guy lines, which can help you reach distant anchor points like trees or larger boulders.
Which type of tent is better for strong winds?
Both types can be strong in wind if pitched correctly. However, a properly tensioned non-freestanding tent often performs exceptionally well because its structure relies on direct tension from stakes and guy lines, allowing it to flex and withstand high winds. Freestanding tents can also be very stable, especially if they have robust pole designs and good staking practices.
Are freestanding tents always heavier than non-freestanding ones?
Generally, yes. The pole system required to make a freestanding tent self-supporting adds weight and bulk. Non-freestanding tents achieve their structure using fewer poles and relying on stakes and guy lines, which typically results in a lighter overall package. However, high-end ultralight freestanding tents are closing this gap.
How much practice does a non-freestanding tent usually require?
It varies by design, but most backpackers find they need a few practice pitches. Understanding how to create proper tension with the guy lines is key to a stable and weatherproof pitch. We found that practicing in your backyard before your first trip makes a big difference in confidence and speed.
What are the best tent stakes for non-freestanding tents?
The best stakes depend on your soil conditions. For general use on dirt, sturdy aluminum Y-stakes or V-stakes offer good holding power. If you’re expecting sandy or very soft ground, sand stakes are essential. For rocky terrain, consider smaller, more durable stakes or even rock anchors if you’re going ultralight and have specific needs.
![7 Best Backpacking Tent For Bad Weather [2026]](https://leonardhomeoutdoor.com/wp-content/uploads/2026/07/7-best-backpacking-tent-for-bad-weather-2026-featured-768x432.jpg)
![7 Man Tent For Hiking [2026]](https://leonardhomeoutdoor.com/wp-content/uploads/2026/08/7-man-tent-for-hiking-2026-featured-768x432.jpg)
![7 Best Budget 4 Season Tent [2026]](https://leonardhomeoutdoor.com/wp-content/uploads/2026/08/7-best-budget-4-season-tent-2026-featured-768x432.jpg)